
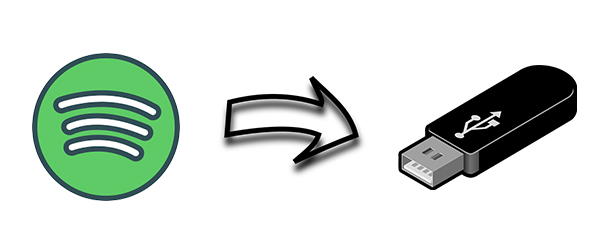
Apple Music is an exceptional music streaming service that grants you access to an extensive library of millions of songs and playlists. It is available on most devices. But there are still some devices don’t support it. If you want to enjoy your Apple Music or iTunes songs on other platforms without limits, you can considering transferring them to a USB drive. It is a great way to free up space on your device and access more flexibility when enjoying your music. In this guide, we’ll walk you through the essentials to transfer Apple Music to USB or iTunes songs/library to USB. Keep reading this post and ready for playback on any device.
Part 1. How to Transfer Music from iTunes to USB Stick [Purchased Songs]
iTunes offers a convenient purchasing feature that allows users to buy and download music directly from the iTunes Store. Purchased songs are stored in your iTunes account and you can download their MP3 files for transferring to other platforms, making it easy to enjoy your tunes on various devices. If you’ve downloaded the purchased songs from iTunes, you can try the following steps to transfer them to your USB stick.
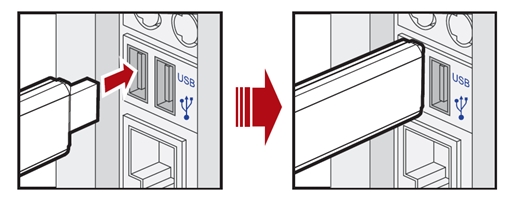
1. Prepare a compatible USB drive in advance and make sure it has sufficient space for storing your songs. Then, plug it into an available USB port on your computer.
2. Launch the iTunes app on your computer. Select Edit > Preferences at the top menu bar.
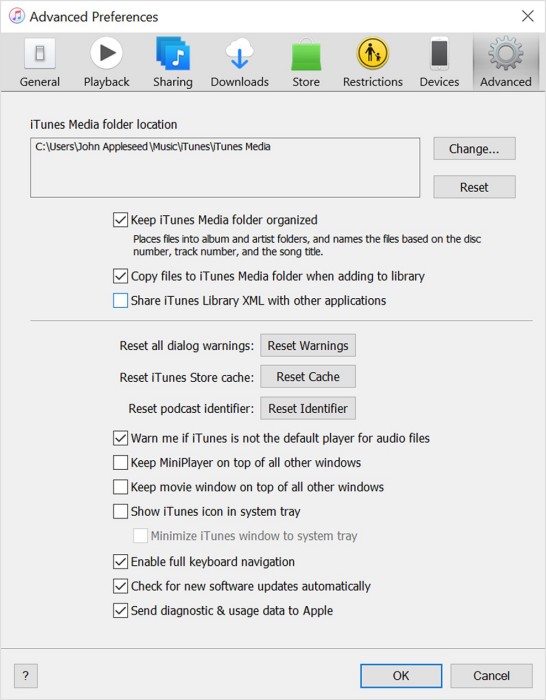
3. Then, switch to the Advanced tab. Here you can see the location of your iTunes songs under the iTunes Media folder location section.
4. Follow the location path to find your iTunes songs via the File Explorer or Finder app.
5. Once you found them, you need to drag and drop them to the USB folder so that they will be transferred to your USB successfully.
Part 2. How to Download Apple Music to USB [All Songs]
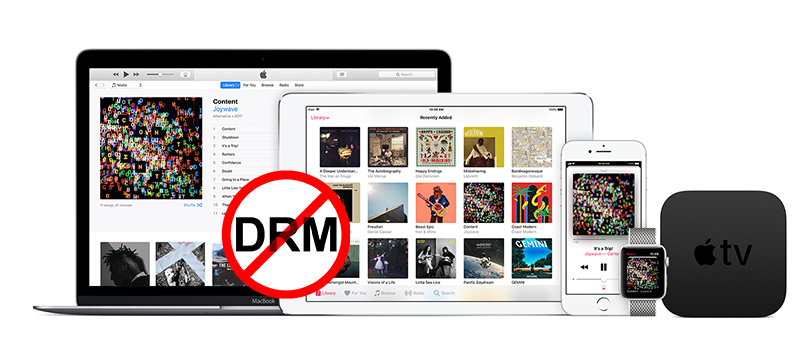
It is easy to transfer the purchased songs from iTunes to your USB. However, other songs on the Apple Music app are all protected by DRM, which limits you to listen to them only within the app. In other words, you can not transfer Apple Music songs to other devices directly. Even if you download them and find the files on your computer, they can not be played normally after transferring to your USB device. To be able to transfer Apple Music to USB, one must first remove DRM from Apple Music and convert all protected Apple Music songs to the unprotected format. You will need a powerful tool to reach it. Here we’d like to recommend the TunesMake Apple Music Converter.
Functioning as an audio converter, the TunesMake Apple Music Converter comes with many features. Its advanced decryption technology helps you to remove the DRM protection on all Apple Music songs and convert them to local files in diverse audio formats, including MP3, AAC, FLAC, and more. It can also handle iTunes audio and Audible books. With a faster conversion speed of 30×, it can quickly complete the batch conversion of several audio files. It can also keep the original audio quality and ID3 tags after conversion. Then, you can transfer all your favorite content from Apple Music to a USB and comfortably listen to them on any device. Go on to read the following contents, and we’ll show how to download Apple Music to USB.

Key Features of TunesMake Audio Converter
- Convert Apple Music to MP3, WAV, FLAC, AAC, and other audio formats
- Remove DRM from Apple Music, iTunes audios, and Audible audiobooks
- Preserve the converted audio with lossless audio quality and ID3 tags
- Support the conversion of audio format at a 30× faster speed in batch
Step 1
Launch TunesMake tool and select music files to be converted
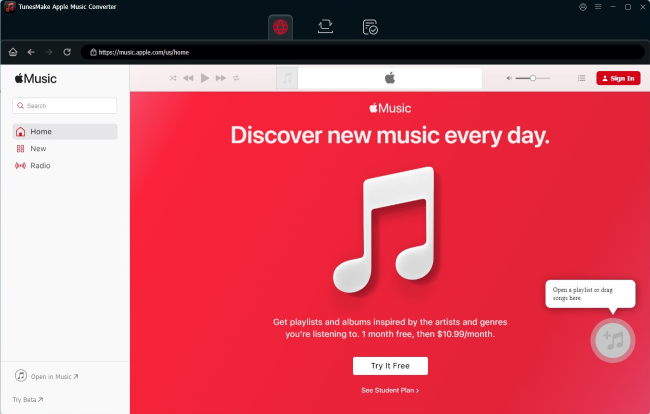
To launch TunesMake Apple Music Converter on your computer, this action automatically loads iTunes immediately. Now add Apple Music songs to the program by simply clicking the Add icon. Another option for importing your desired Apple Music songs is by dragging them to the interface of the program. Currently, the TunesMake software allows for batch conversion of several files at a go with a faster conversion speed of 30×.
Step 2
Select the output audio format and set the audio parameters
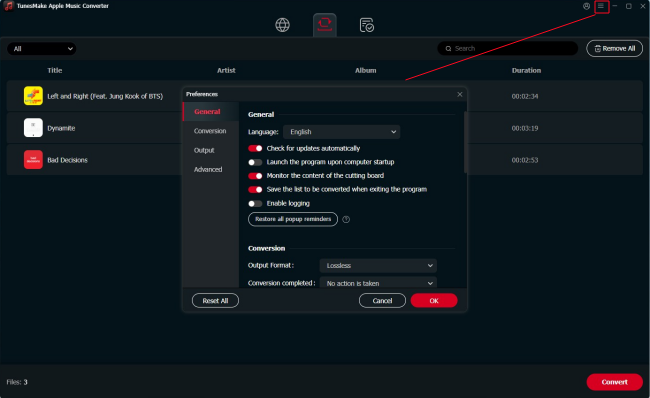
After loading all the audio files to the tool you can opt to edit the track information including title, album, artist, genre, and more, or choose to adjust the volume of each track. Next, click the Format icon and start to configure the output audio parameter. There are six formats including MP3, AAC, FLAC, WAV, M4A, and M4B for you to choose from. You can also adjust other audio parameters like channel, codec, sample rate, and bit rate.
Step 3
Start to convert Apple Music to the selected format
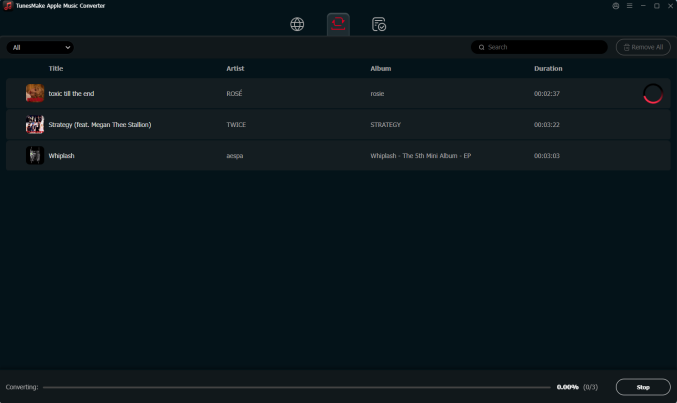
After all your settings are done, you can now click the Convert button and the TunesMake software will begin to convert the imported Apple Music songs to MP3 or other audio formats you desire. After completing the conversion, you can click the Converted button at the top of the interface. Then you could browse all the converted songs.
Step 4
Copy the converted Apple Music songs to a USB drive
Once the TunesMake Apple Music Converter completed the conversion of Apple Music songs, you can easily transfer them to USB. Just navigate to the folder where you save the converted Apple Music songs and copy them to USB. The songs can now be listened to from any device compatible with the music format selected.
Part 3. How to Transfer Your iTunes Library to USB
While it’s true that DRM-protected iTunes songs cannot be directly transferred, you are allowed to move your entire iTunes library to a USB drive. This is helpful when you need to move your iTunes library to another computer. To create a reliable backup of your music library, you can try the following steps.
1. Launch the iTunes app on your desktop and sign in to your Apple ID.
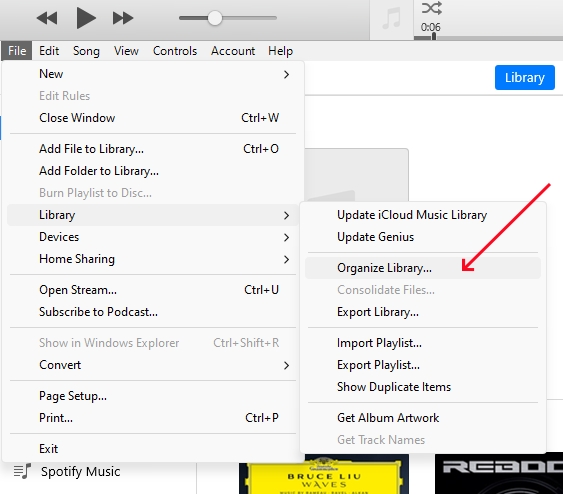
2. Click File > Library > Organize Library.
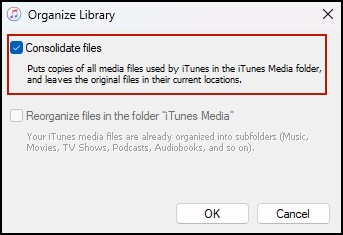
3. Then, in the new pop-up window, you need to select Consolidate files > OK. Once finished, iTunes will place the copied files in the iTunes folder.
4. To find the iTunes Media folder’s location, you can head to the iTunes app and select Edit > Preferences > Advanced > iTunes Media folder location.
5. Remember the location and navigate to your iTunes folder in File Explorer.
6. Drag the iTunes folder from its location to your USB folder directly.
Part 4. FAQs about Apple Music to USB
Q1: Can I transfer Apple Music to USB?
A: In fact, you cannot directly save Apple Music to USB because all songs from Apple Music are streaming content not compatible with other devices and platforms. To move Apple Music to USB, you could use the aforementioned method, that is, to use Apple Music Converter. Then you don’t need to worry about how to export Apple Music to a USB drive.
Q2: Where can you play Apple Music with a USB?
A: After successfully transferring Apple Music to a USB, you can play Apple Music with a USB on those devices coming with a USB port. Those devices such as smart TVs, PS4 , Xbox One , smart speakers, and more all support playing music from a USB with a built-in media player. The greatest thing is that you can play Apple Music in the car via USB.
Q3: How long could I keep those Apple Music songs on a USB?
A: You do keep those Apple Music songs on a USB forever. After using an Apple Music Converter, you convert Apple Music to the format supported by the USB drive. This means those Apple Music songs are saved in the common format. So, even though you cancel your Apple Music subscription , you can still hold those music files.
Q4: What music formats are supported for USB drives?
A: A lot of music formats are supported on USB drives. Typically, you can upload the following files to your USB drive: MP3, WAV, AAC, WMA, FLAC, ALAC, AIFF, DSD, and more. If you want to play music in your car via USB, MP3, and WAV are recommended since they are compatible
Q5: Can I listen to Apple Music songs from the USB on any device?
A: Yes, after transferring your Apple Music songs to a USB drive in normal audio format, you can listen to them on any device that supports USB drives and the audio formats you selected.
Part 5. Conclusion
Apple Music is a very good source of online music. If you want to back up your music library or free up the storage space of your device, you can try to transfer Apple Music to USB. Although you are only allowed to transfer the purchased songs, the TunesMake Apple Music Converter can help you download all your favorite Apple Music and iTunes songs locally. Once downloaded, it’s a piece of cake for you to transfer them to a USB device. What’s more, you can listen to the converted Apple Music on any device forever.
Related Articles


A professional writer at TunesMake, crafts in-depth tutorials, practical tips and expert advice focusing on streaming music, technology, and more.
- 1
- 2
- 3
- 4
- 5
- 6
- 7